

Thank you for visiting this eBook design tutorial. We now have an eBook design startup—BB eBooks—dedicated to helping independent authors and small presses get their eBooks formatted, converted, and ready for sale at all the major online retailers (e.g. Amazon's Kindle Store, Barnes & Noble's Nook, iBookstore, Smashwords, etc.) Please contact us for a no-obligation quote. For those writers, editors, and publishers looking to go the DIY route for eBook production (you probably are if you visited this page), we offer free online tutorials and apps to help you professionally design your eBook. Please visit our Developers page and let’s work together to improve the overall standards of eBooks. Also, please sign up for the mailing list for promotions, design & marketing tips, plus eBook industry news.

Looking for a complete guide on eBook design and development? Please consider The eBook Design and Development Guide, which contains everything you need to know about HTML, CSS, EPUB, and MOBI/KF8 to make an eBook like a pro. Pick it up at Amazon for $6.99 today.
Warning This Content is Out of Date. Please head on over to the BB eBooks Developers Page for the most up to date information on eBook creation.
The full tutorials for the eBook formatting series include a basic XHTML tutorial, a tutorial for converting your manuscript into XHTML, and a Calibre tutorial for converting XHTML into eBooks. For those looking for something more advanced, you can also peruse the Regular Expressions tutorial, as well as the EPUB and KindleGen tutorial. Templates for XHTML and EPUB are also available for your formatting arsenal. Additionally, there are some helpful hints for formatting for Smashwords in this tutorial.
Table of Contents for Turning a Manuscript into Clean XHTML
Introduction to Converting a Manuscript into XHTML
Prepping Your Word Processor's Document
Adding the Fancy Special Characters
Preserving Italics/Bold/Underline
Preserving Hyperlinks
Nuking Your Word Processor's Formatting
Cleaning the Raw Text
Dealing with Special Characters
Stopping Point for Formatting Both EPUB/MOBI and Smashwords
Converting Special Characters to HTML
Wrapping Text in Paragraph Tags
Coding XHTML around Italics/Bold/Underline
Adding Your Document to an XHTML Template
Styling Your eBook with CSS
Adjusting the Default Paragraph Style
Formatting the Title/Copyright Page
Formatting Chapter Headings
Formatting Section Breaks
Styling Material in the Back
Adding Unordered and Ordered Lists
Adding Images
Adding Hyperlinks and Prepping the Table of Contents
Adding External Hyperlinks
Anchors and Internal Hyperlinks
Discussion of the Table of Contents
Adding <div> Anchors for NCX and Traditional Tables of Contents
Establishing Anchors for a more Customized NCX (Optional)
Verifying your XHTML
Video Tutorials
Introduction to Converting a Manuscript into XHTML
Your work has been edited ten times, beta-read by your aunt, the cover design is sharp, and you are ready to self-publish your work to make some money. The problem is that the formatting in your word processor is a complete mess. Trying to convert it from your word processor straight to an eBook format and uploading to Amazon would make your readers want to punch you in the face.Now that you understand the basics of programming in XHTML by studying the tutorial on this website, you can get down to the business of taking a manuscript that's in your word processor and turning it into clean XHTML code. This is the most crucial part in ensuring that your eBooks look perfect. It may take you a while to format your eBook the first time, but once you get the hang of it, all of your eBooks can be converted with ease. Follow the instructions step-by-step since they cannot be performed out of sequence. If you can write a book, you can do this.
Prepping Your Word Processor's Document
This step involves working with the messy formatting in your word processor to get it ready to copy and paste into a text editor. When you copy from your word processor and paste into a text editor, you will lose all the formatting. "Nuking" the formatting is necessary to guarantee a 100% clean XHTML code. However, this process has the undesirable effect of removing italics/bold/underlined text and hyperlinks that were in your word processor's document. You can either re-insert these manually in your text editor or follow the steps in this guide to automatically re-create them in XHTML code. The decision is yours.Roughly Layout Your Document
It is not necessary to adjust the formatting of your document in your word processor, since we are going to nuke all the formatting. However, you should lay it out in a logical sequence to save yourself some time when you begin converting the text into XHTML code in the text editor.
This guide recommends the following sequence for fiction eBooks:
- Title/Copyright Page
- Story
- Author's Notes
- About the Author
- Back jacket description/Dedications/Blurbs/Credits/Etc.
- Table of Contents (optional)
It should be noted that the Table of Contents is optional. Keep in mind that eBook formats have a meta Table of Contents called the NCX. This allows the reader to tap a button and the Table of Contents appears on their eReader. There are different schools of thought on this, but this guide feels that a Table of Contents in both the metadata and in the actual eBook content is a good practice for works of fiction.
This guide recommends the following for non-fiction eBooks:
- Title/Copyright Page
- Table of Contents
- Content
- Appendices/List of Figures
- Author's Notes
- About the Author
- Back jacket description/Dedications/Blurbs/Credits/Etc.
Unlike works of fiction, you probably want a nice Table of Contents that you craft yourself after the title page. This means you will have an NCX Table of Contents and a traditional Table of Contents in the content of the eBook.
Title/Copyright page content: Since simplicity is elegance, this guide recommends the following for a title/copyright page, which is suitable for the Amazon.com Kindle Store and Barnes & Noble NOOK.
Title
by FirstName LastName
Copyright 2011 FirstName LastName
While it is nothing fancy, this title/copyright page is perfectly acceptable. Great selling self-publishers like Stephen Knight do the same thing in their title/copyright pages.
Important Note (1): To save yourself headaches, only put in the text of the Table of Contents at this point. Do not worry about hyper-linking until you are inside the XHTML code.
Important Note (2): The cover art will be added in Calibre during the conversion process. Do not worry about it at this time.
Adding the Fancy Special Characters
You may want to put the fancy curled double and single quotes, proper em-dashes, ellipsis, and en dashes throughout your manuscript. Readers seem to like them in works of fiction and the customer is always right. Even though they look similar to the keys you type in your keyboard, these are completely different characters as far as an eReader is concerned. Observe how normal and special characters are slightly different:Rather than adding all the fancy characters manually, it's best to get the word processor's Autoformatting capabilities to accomplish this task.This “ ” ‘ ’ … – —Not " " ' ' ... - --
To enable Autoformatting for curled double quotes, curled single quotes, en dashes, and em dashes, perform the following steps (this guide uses Microsoft Word 2007 as an example):
- Click the Windows Icon in the upper left
- Click Word Options
- Click Proofing
- Click AutoCorrect Options
- Under the Autoformat tab, de-select all boxes except for Straight Quotes for “Smart Quotes” and Hyphens (--) with Dash (—)
- Under the Autoformat as you Type tab, de-select all boxes except for Straight Quotes for “Smart Quotes” and Hyphens (--) with Dash (—)
 |
| Enable Autoformatting Steps 1-2 |
 |
| Enable Autoformatting Steps 3-4 |
 |
| Enable Autoformatting Step 5 |
 |
| Enable Autoformatting Step 6 |
Perform the following steps in the Find and Replace window and select Replace (or Replace All if you feel lucky) after each step:
Important Note: This guide places quotes around anything that should be typed. Do not actually insert the quotes.
- FIND """ REPLACE """ (adds fancy double quotes)
- FIND "'" REPLACE "'" (adds fancy single quotes)
- FIND "..." REPLACE "…"(adds ellipsis rather than three periods)[to type in the ellipsis you can press Ctrl-Alt-.]
- FIND "--" REPLACE "—" (adds em dash rather than two hyphens)
- FIND " - " REPLACE " – " (adds en dash rather than space-hyphen-space)[note: the FIND is space-hyphen-space and REPLACE is space-endash-space]
Preserving Italics/Bold/Underline
Since you will strip out all formatting, you need to have a way to preserve the desired Italics/Bold/Underline text that is in the body of your Word document. Do not worry about preserving the bold headings for Title, Chapters, Author's Notes, etc., because you will alter those manually in the XHTML code.The purpose of this step is to have placeholder tags within the content for your desired italics/bold/underline text. These placeholder tags can also be used in a similar fashion when preparing your document for Smashwords. After pasting your document into the text editor, you will encode the proper XHTML tags.
Perform the following steps using the Find and Replace feature in Microsoft Word (Ctrl-H):
- FIND Ctrl-I REPLACE "QQQ^&QQQ" [in the Find window press Ctrl-I so it says "Font: Italic"]
- FIND Ctrl-B REPLACE "BBB^&BBB" [you can skip Headings]
- FIND Ctrl-U REPLACE "UUU^&UUU"
 |
| Find Italics Step 1 |
The "^&" in the Replace window is a Microsoft Word identifier that refers to whatever is in the Find window. For Open Office, the identifier is simply "&".
 |
| Properly Wrapped Placeholder Tags |
Preserving Hyperlinks
You may have inserted hyperlinks into your word processor's document. These will show up as blue text that is underlined. When the document is copy and pasted into the text editor, you will not lose the text, but you will lose the hyperlink information.This guide recommends inserting hyperlinks manually during the XHTML coding process. However, if you have numerous hyperlinks, you may wish to add the XHTML code within the word processor's document to ensure that none are lost.
To preserve hyperlinks, perform the following steps:
- Turn off Autoformatting Options (this ensures you get the normal quotes rather than fancy quotes for step 6)
- Press Alt+F9 to turn on Field View
- Manually cycle through your document to search for hyperlinks (F11 goes forward and Shift+F11 goes backward)
- Copy the hyperlink within the Field View
- Press Alt+F9 to Turn off Field View
- Wrap an XHTML <a> tag around the hyperlinked text (e.g. <a href="target">hyperlinked text</a>)
- Repeat for each hyperlink
 |
| Turning On and Off Field View with Alt+F9 |
 |
| Wrapping XHTML Tags Around Hyperlinks |
While this is a particularly tedious process, especially if you have numerous hyperlinks, VBA script is required to automatically extract the hyperlink target from the field. If you don't know what VBA script is, don't worry about it, neither does the author of this guide.
Nuking Your Word Processor's Formatting
Now that you have all the special characters and placeholder tags where you want, it's time to export the entire contents of your word processor's document to a text editor. This will strip all the formatting and corruption that resides inside your word processor.Copy and paste everything into a clean document by performing the following steps:
- Turn off the comments/track changes feature under the Review tab.
- Press Ctrl-A and Ctrl-C to select the entire document and copy it to your clipboard
- Open your text editor to a blank document
- Ctrl-V to paste
 |
| Text Editor with Document |
Make sure that the text editor took in the special characters (e.g. the “ and ” didn't get changed to " and "). There may be a bunch of blank lines, spaces in front of some paragraphs, and other nastiness. You will get rid of this unwanted whitespace in the next step.
Cleaning the Raw Text
Now that you have your document in a text editor, it is necessary to get rid of all the extra whitespace. The final raw text should have no blank lines, no spaces before or after the end of each paragraph, and absolutely no tabs. This bumper and fender work will ensure you have the cleanest possible XHTML code.Perform the following steps to remove whitespace:
- Delete tabs with FIND "\t" REPLACE "" [for functionality of "\t" in Notepad++, click on Extended Search mode]
- Delete spaces before and after each paragraph [in Notepad++ go to Edit->Blank Operations->Trim Leading and Trailing Spaces]
- Find " " Replace " " [removes double spaces]
- Delete all blank lines by performing manually (basic), or performing automatically with FIND "\n\r" REPLACE "" [ensure Extended Search Mode selected]
 |
| Finding and Deleting Tabs (Step 1) |
 |
| Deleting Spaces Before and After Paragraphs in Notepad++ (Step 2) |
 |
| A Clean Raw Text Document |
Dealing with Special Characters
Special characters can be roughly defined as characters which are not one of the keys on an English keyboard. This definition is rather crude, but the history and complete understanding of this goes way beyond this guide. It is important that you either eliminate all special characters or properly convert them into the HTML Entity Name codes. Otherwise, the text can show up as junk on eReader devices.It is time to go on the special character scavenger hunt. These special characters can be randomly inserted by your word processor without you even knowing it. As an example, Microsoft Word auto-corrects "naive" to "naïve" as a default setting, so you have to watch out for characters like that little "ï".
To find those pesky special characters that may cause problems, perform the following steps in your text editor:
- Ctrl-F for Find
- Click on Regular Expressions in the Find Window
- FIND "[^<>A-Za-z0-9\.,'"?\\\^\|\-\[\]:!;()/$#@&%*_+{}=~\s…“”‘’–—]"
 |
| Finding Special Character |
This crazy search string in the Find window is called a "regular expression", and you can learn more about these at the Regular Expression Tutorial for eBook formatting. It will go through the document and look for any characters that may give your readers headaches by showing up as junk in their eReader. This guide recommends finding a way to work around the special characters so that they don't make it into your final eBook (e.g. deleting them). Therefore, you could change "naïve" to "naive" or look up the HTML Entity Name code for ï.
Stopping Point for Formatting Both EPUB/MOBI and Smashwords

Converting Special Characters to HTML
You may recall from the XHTML tutorial for eBook formatting that it is necessary to change special characters into their HTML Entity Name Codes. This will prevent certain eReaders (such as Adobe Digital Editions) from turning your fancy quotes, ellipses, and dashes into junk. To repeat, it is important to replace them with HTML Entity Name codes (e.g. "“" is "‘") NOT the HTML Entity Number codes(e.g. "“" is "“"). The HTML Entity Number codes do not convert through Calibre very well.Below is a list of the common special characters that can be searched for, but you may have more in your manuscript. A comprehensive list of the HTML Entity Name codes is here if you have a lot of special characters in your document that you need to replace.
When using the Find and Replace feature, be careful not to insert any unintentional spaces. Here is a list of common special characters:
- FIND "&" REPLACE "&" (Note: due the ampersand first, if you don't you'll see why)
- FIND "“" REPLACE "“"
- FIND "”" REPLACE "”"
- FIND "‘" REPLACE "‘"
- FIND "’" REPLACE "’"
- FIND "…" REPLACE "…"
- FIND "–" REPLACE "–"
- FIND "—" REPLACE "—"
- FIND "<" REPLACE "<" (note: Be careful if you already applied the XHTML <a> tag in your word document)
- FIND" >" REPLACE ">" (note: Be careful if you already applied the XHTML <a> tag in your word document)
 |
| Sample Conversation with HTML Entities Properly Added |
Wrapping Text in Paragraph Tags
You now have your raw text purged of unwanted whitespace, and you have replaced the special characters with HTML Entity Name Codes. Each paragraph and heading should be on its own line. However, the text is not yet a valid XHTML file. As you recall from the XHTML tutorial, XHTML code needs to be wrapped in block elements (e.g. <p> and </p> tags) to be valid.You may have hundreds of lines of text, so it would be laborious to go through and wrap a <p> and </p> around each paragraph. A simple solution is to use a regular expression in the Find and Replace Window (Ctrl-H).
Perform the following steps to wrap paragraph tags around every line:
- Press CTRL-H to pull up the Find and Replace window
- Under Search mode, click the Regular Expression radio button
- FIND "^(.+)$" REPLACE "<p>\1</p>" [note: may be "<p>$1</p>" for some text editors]
 |
| Wrapping Paragraph Tags on Each Line |
 |
| Properly Wrapped Paragraph Tags |
Coding XHTML around Italics/Bold/Underline
In your word processor, you put the placeholder tags QQQitalics textQQQ around italicized text, BBBbold textBBB around bold text, and UUUunderlined textUUU around underlined text. You need to replace these with proper XHTML code.To accomplish this, you can put it what's called <span> tags. These tags alter the style of text for in-line elements within a paragraph. They can alter one or more words within a paragraph, but should not be used to modify the style values of an entire paragraph.
These steps will wrap <span> tags with styles defined in the CSS. You want to perform this step ahead of putting the document into an XHTML template to prevent accidentally altering values within the XHTML head while using the Find and Replace function.
Using the Find and Replace function (Ctrl-H), perform the following steps:
- FIND "(QQQ)(.*?)(QQQ)" REPLACE "<span class="i">\2</span>"
- FIND "(BBB)(.*?)(BBB)" REPLACE "<span class="b">\2</span>"
- FIND "(UUU)(.*?)(UUU)" REPLACE "<span class="u">\2</span>"
 |
| Before and After XHTML Added for Italics/Bold/Underline |
Adding Your Document to an XHTML Template
This step involves copying all your progress so far in the text editor and pasting it into an XHTML template. A free template for XHTML can be downloaded here. This will ensure that your web browser and, more importantly, the Calibre software, properly recognize the XHTML source code of your eBook. Once you have completed this step, you will have a valid XHTML document that can be viewed in a web browser.Perform the following steps to copy your document into the XHTML template:
- In your text editor, press Ctrl-A and then Ctrl-C to copy everything from your working document
- Open the XHTML template (download here)
- Between the <body> and </body> tags, paste your working document with Ctrl-V
- Save as a new document with an .html extension
- Change the title between the <title> and </title> tags in the XHTML Head Section to the title of your eBook
 |
| Generating a Valid XHTML Document |
Verify that all the HTML Entity Name Codes are properly seen as special characters in your web browser. If not, re-examine your XHTML document and determine where you made an error. Verify that your italics/bold/underline <span> tags have properly altered the text. If you inserted hyperlinks into your document during the word processor preparations, verify that they work.
It doesn't look pretty right now, because you have not added any different styles yet, but just one more step and you will have the XHTML source code of your eBook.
 |
| First Look at eBook in a Web Browser |
This code resets any strange default margins in the web browser or eReading device for all tags listed. It was developed by a gentleman named Guido Henkel, who has an excellent online series on eBook formatting. If you plan on using any of these tags within the body of your XHTML code (e.g. h1, h2, h3, ul, ol), be sure to redefine them in your CSS after the reset code.html, body, div, h1, h2, h3, h4, h5, h6, ol, dl, dt, dd, p, blockquote, pre, form, fieldset, table, th, td, tr { margin: 0; padding: 0.01em; }
Styling Your eBook with CSS
The Cascading Style Sheet (CSS) has already been placed in the XHTML template so that you can easily manipulate the XHTML code. You should feel comfortable adjusting the predefined properties and values. If not, this guide recommends consulting the XHTML tutorial for eBook formatting.This is the most important step of the eBook formatting process. Presentation and first impressions are everything. How much time you spend making your eBook look professional directly correlates with reader satisfaction.
Adjusting the Default Paragraph Style
The default paragraph style is how your text will be styled if you enter <p>text</p> with no attributes in the <p> tag. At this step, all text in your document is in the default paragraph style, because you have not yet added any class attributes to individual <p> tags. Typically, the default paragraph style should be the style you want for your story or content.The XHTML standard template for fiction available in this guide defines a 1.25em indent. The margins above and below each paragraph are defined at 0em, which means the spacing between paragraphs will be the same space apart as in between lines on a paragraph. This applies a First Line Indent type paragraph.
The style properties and values in the CSS for the default <p> tag are defined as follows for fiction:
p{text-indent: 1.25em;margin-top: 0em;margin-bottom: 0em;}
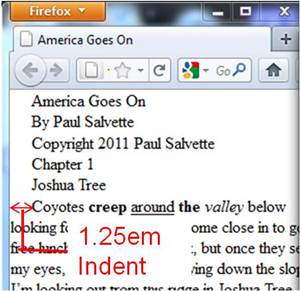 |
| First Line Indent of 1.25em |
The style properties and values in the CSS for the default <p> tag are defined as follows for non-fiction:
p
{
text-indent: 0em;
margin-top: 0em;
margin-bottom: 1.0em;
}
 |
| Block Indent with 1.0em Bottom Margin |
Important Note: This guide recommends not defining text-alignment values (i.e. text-align: left, center, right, or justify;) for the default paragraph style. You will be able to define justification during the Calibre conversion process. Likewise, left and right margins should be defined in Calibre, because the margin values recommended for MOBI formats are different than the recommended margin values for EPUB formats.
Formatting the Title/Copyright Page
Now that you have your default paragraph style the way you want it to look, you need to begin individually altering the <p> tags that are wrapped around the title, front matter material, chapter headings, and other non-standard text. For the title, you probably want it to have a bold font-weight, aligned to the center, and bigger than the standard 1.0em font size of the eBook content.The XHTML standard defines the title values as follows in the CSS:
To apply this style to your title, you simply add class="title" into the <p> tag that wraps around the title text. An example of the XHTML code is as follows:p.title /*Use for the title on the first page*/{text-indent: 0em;font-size: 2.0em;font-weight: bold;margin-top: 1.5em;margin-bottom: 1.0em;text-align: center;page-break-before: always;}
<p class="title">America Goes On</p>
<p>by Paul Salvette</p>
<p>Copyright 2011 Paul Salvette</p>
 |
| Applying a Style to the Title |
Now you want to adjust the copyright information below the title. The typical eBook standard is that front matter material is centered. In the CSS, there is a style defined as follows:
Try adding the class="front" code into the <p> tags wrapped around the copyright information. The XHTML code would look similar to this:p.front{text-indent: 0em;margin-top: 0em;margin-bottom: 1.0em;text-align: center;}
<p class="title">America Goes On</p><p class="front">By Paul Salvette</p><p class="front">Copyright 2011 Paul Salvette</p>
 |
| Applying Styles to Copyright Information |
The XHTML would look as follows:
<p class="title">America Goes On</p>
<p class="front">By Paul Salvette<br />Copyright 2011 Paul Salvette</p>
 |
| Using Line Breaks |
Formatting Chapter Headings
You probably want the font size of the chapter headings to be bigger than the text of the content, as well as the headings being bold and centered. It is also important that the eReading device recognize page breaks at each chapter heading. These are the style values for the chapter class that is in the CSS of the XHTML standard template:To apply the XHTML code, you simply add class="chapter" into the <p> tags that wrap the text saying "Chapter…". An example of the XHTML code would look like this:p.chapter{text-indent: 0em;font-size: 1.5em;font-weight: bold;margin-top: 1.0em;margin-bottom: 1.5em;text-align: center;page-break-before: always;}
<p class="chapter">Chapter 2 - Reflections</p>
 |
| Applying Style Values to Chapter Headings |
If your book has a lot of chapters and you want to automate this process, you can use a regular expression in your text editor to make short work of the task. See the Regular Expression Tutorial to learn more about how this syntax works. Try to use the following, if desired:
FIND "(<p>)(Chapter.*?)(</p>)"REPLACE "<p class="chapter">\2\3"
Formatting Section Breaks
Section breaks are typically used to indicate a break within a chapter. There are different standards and opinions about how they should look (such as "#", "###", "***", etc.) This guide will use "***" as an example.In the XHTML Standard Template, a style has been defined in the CSS as follows:
This will align the "***" in the center and place a top and bottom margin of 1.0em around the "***". It is important that the indent be set to 0em, or else the "***" will not be correctly centered.p.centered{text-indent: 0em;margin-top: 1.0em;margin-bottom: 1.0em;text-align: center;}
The XHTML code would looks as follows:
<p class="centered">***</p>
 |
| Properly Centered Section Break |
FIND "(<p>)(\*\*\*)(</p>)"REPLACE "<p class="centered">\2\3"
Styling Material in the Back
Now that the title, chapter headings, and content have all been finalized in the XHTML, it is necessary to adjust the material that comes at the end. Self-publishers like to put extra goodies back here such as About the Author information, Author's Notes, Dedications, Reviews, Links to Other Books, Excerpts, etc. A good practice is to put most of the extra material in the back, because when people look at a free sample (only covering 20% of the entire eBook on the Amazon.com Kindle Store), you want them to have the opportunity to read actual content.If you are publishing fiction, your story was probably in First Line Indent. Perhaps you would like the About the Author page to be Block Indent. This is an easy fix, since there is a Block Indent paragraph style in the XHTML Standard CSS called "Notes". Its properties and values are defined as follows:
It is exactly analogous to the default <p> style in the XHTML Standard for non-fiction.p.notes{text-indent: 0em;margin-top: 0em;margin-bottom: 1.0em;}
You may also want to apply styling to the back material headings that makes them big, bold, and centered. This will also force page-breaks in eReading devices since the page-break-before: always; value is part of the style. The style for back material headings is called "headline" with properties and values as follows:
An example of XHTML code that exists in the material after the story might look as follows:p.headline /*Use for Author's Notes, Excerpts, etc. headings*/{text-indent: 0em;font-size: 1.5em;font-weight: bold;margin-top: 1.0em;margin-bottom: 1.5em;text-align: center;page-break-before: always;}
<p>Last paragraph in the book</p>
<p class="centered">THE END</p>
<p class="headline">About the Author</p>
<p class="notes">Come to my website and learn more about me.</p>
 |
| Example of Changing Styles in Back Matter |
Adding Unordered and Ordered Lists
After you have styled the text exactly the way you want it to look in the eReading device (with the exception of page breaks), you may want to add a few bells and whistles. Bulletized and numbered lists do not transfer over very well from a word processor into a text editor. Therefore, it is necessary to manually code them into the XHTML. There is more background on unordered and orders lists in the XHTML tutorial.In the XHTML standard, there are properties and values in the CSS that define lists as follows:
ul /* Defines an unordered list (bullet points) */You will notice there is a left margin of 3.0em. This is because the <ul> and <ol> styles were defined in the reset code at the beginning of the CSS as 0. If you do not add a left margin, the bullets for unordered lists and numbers for ordered lists will be off to the left of the viewing window.
{
text-align: left;
margin-left: 3.0em;
margin-top: 0em;
margin-bottom: 0em;
}
ol /* defines an ordered list (1,2,3,etc.) */
{
text-align: left;
margin-left: 3.0em;
margin-top: 0em;
margin-bottom: 0em;
}
You may also wonder why there are no top and bottom margins in the CSS style for lists. This is because the <ul> and <ol> tags set off a line break automatically in most web browsers and eReaders. When lists are converted into EPUB and MOBI by Calibre, they often have erroneous results in regards to spacing. Try to adjust the margins in the XHTML code to get it right in the web browser prior to eBook conversion. If the conversion in Calibre is problematic, use trial and error to adjust your XHTML source code. It is a frustrating but necessary process due to the different ways that MOBI and EPUB interpret margin properties and values.
Sample XHTML code for an unordered list would look as follows:
<p class="notes"> The people who made this happen.</p><ul><li>Paul Salvette - Author</li><li>Ben Salvette - Editor</li><li>Sitapat - Cover Artist</li></ul>
 |
| Example of an Unordered List |
Adding Images
Images are a way to make your book interesting. However, you should not add too many, because they can take up excessive space. One 300x300px image is probably the same size in KB as the entire XHTML source code. Many eReading devices have limited space, so it would be presumptuous to take up their valuable space with your one published book. Additionally, if a reader has a slow internet or cellular connection, it would take an excessively long amount of time to download your eBook. This will certainly leave a bad first impression. The max image size accepted on the Amazon.com Kindle store (except the cover) is 500x600px.To limit the size of your images, this guide recommends using photo editing software, such as Photoscape, to downsize the larger images. The cover image should be 600x800px (recommended by Amazon.com for Kindle, as well as being suitable for Nook and Smashwords) and approximately 80 - 200KB. Images appearing within the text should generally be no larger than 30KB (however, the Amazon.com Kindle store allows images up to 127KB before automatically compressing them). The JPEG format is a highly-compressed format that is of suitable quality. However, if your image has line art and text (like an image of an Excel table), you should use the GIF format. Using a GIF instead of JPEG for text and line art will prevent blurring. The PNG is very high quality, but big in size. Using a PNG can be beneficial if you want to have an image with minimal compression like a company logo.
Photo editing software has the ability to adjust the quality of an image. You can half the size of a JPEG simply by adjusting the quality from 100% to 95%. When in doubt, keep the KB size of your eBook small.
Those with previous knowledge of HTML may be familiar with the height="xxx" and width="xxx" attributes, which allows you to set an image's exact size. This guide recommends avoiding their use because 1) images look better when re-sized by photo editing software rather than an eReading device, and 2) the file size of the eBook should be kept as small as possible.
For any images you want to insert into your content, the file should be in the same directory as your filename.html file. However, during the eBook conversion process, the JPEGs will be compressed within the EPUB and MOBI format, so that the EPUB and MOBI act as standalone eBooks.
As an example, the file "monica.jpg" is in the same file as your XHTML file. Too add this image to your text you simply add the following code:
<p><img src="monica.jpg" alt="Picture of Monica" /></p>In regards to the Src="picname" and alt="text description" syntax for the <img /> tag, the "text description" is required for EPUB validation. The image tag must be closed with the "/>" to ensure XHTML validation.
To align the picture to the left, right, or center, the values can be added to the class attribute of the <p> tags in a similar fashion as text. Valid XHTML has <img> tags within <p> tags:
<p style="text-align: left;"><img src="monica.jpg" alt="Picture of Monica on the Left" /></p><p class="notes">A picture of my baby!</p><p style="text-align: right;"><img src="monica.jpg" alt="Picture of Monica on the Right" /></p><p style="text-align: center;"><img src="monica.jpg" alt="Picture of Monica in the Center" /></p><p class="notes">Too much baby</p>
 |
| Various Alignment of Images |
If you are having trouble getting the image and text perfectly centered, try setting the text-indent value to 0em. This can be accomplished as follows:
<p style="text-align: center; text-indent: 0em;"><img src="monica.jpg" alt="Picture of Monica in the Center" /><br />too much baby</p>
 |
| Use <br /> to Make Image Captions |
Adding Hyperlinks and Prepping the Table of Contents
This section is the most complicated part of the workflow process to finalize your XHTML source code. You need to have close attention to detail to add the hyperlinks and anchors correctly. Otherwise, a reader will click on a broken link or the Table of Contents will point to the wrong parts of the eBook.
Adding External Hyperlinks
One of the best advantages of eBooks over print books is the ability to make them interactive by adding hyperlinks. For example, if you want to provide a website for further information on eBook formatting, you can easily add a hyperlink that a reader can click inside their eBook. This is also handy for self-promotion, because you can link back to your website to encourage readers to access more of your published work. You can even add email addresses, so readers can easily get in touch with you. As you can see, hyperlinked text by default will change the text color to underlined blue to indicate to the reader that this is a clickable hyperlink.Important Note: Be careful about hyperlinking to Amazon.com links in the Smashwords document. Their review process will sometimes reject your work from the Premium Catalog if you link to anything on Amazon.com, since the vendors they distribute to (Kobo, Sony, Nook, etc.) want to boost market share and pretend that Amazon.com doesn't exist.
To add a hyperlink to a website, you simply add the following XHTML code:
To add a hyperlink that pulls up the reader's default email program with an email address in the "TO:" window, you add<a href="target URL">hyperlink text</a>
An example of XHTML code would be as follows:<a href="mailto:emailaddress">hyperlink text</a>
<p class="notes">The <a href="http://usmc.org">people</a> who made this happen.</p><ol><li>Paul <a href="mailto:paulsalvette@gmail.com">Salvette</a> - Author</li><li>Ben Salvette - Editor</li><li>Sitapat Dijaroen - Cover Artist</li></ol>
 |
| Adding Hyperlinks to XHTML |
Anchors and Internal Hyperlinks
Hyperlinks can also be utilized to link to other places within your XHTML. These are useful if you are working on a non-fiction eBook, and you want your readers to easily cross-reference other sections. For example, you could click on this hyperlink and go back to the top of this tutorial.Establishing an anchor and hyperlink is a two-part process. You will set the destination of the hyperlink with an anchor that has the following syntax:
Then, you will establish the hyperlink to that anchor with the following syntax:<a id="anchorname">Anchored Text</a>
<a href="#anchorname">hyperlink Text</a>An example of the two-part XHTML code would be:
<p>Dad <a id="anchor1">drove me home in silence.</a></p>
<p>In reference <a href="#anchor1">to the part of the book</a> with Dad.</p>
 |
| Hyperlinking to Anchors |
Discussion of the Table of Contents
An important feature in eBooks is the Table of Contents, which provides a way for readers to click through chapters and sections on their eReader or go to a specific chapter or section. Every eBook should have a meta Table of Contents, which is called the "NCX" or "Navigation Center eXtended." The NCX is pulled up whenever a user clicks on a button on their eReader (typically the "Table of Contents" button). |
| An NCX for an EPUB using Adobe Digital Editions |
Another Table of Contents is actual XHTML content within your eBook, analogous to what you may see in a print book. This traditional Table of Contents is optional, but may be desired if you are working on non-fiction. It is the part of the eBook where the reader can click on hyperlinks to various chapters and sections. This traditional Table of Contents that exists within the content of the eBook can be manually coded into the XHTML.
 |
| A Traditional Table of Contents in an eBook |
Important Note: The MOBI format has a convoluted system whereby there is an NCX Table of Contents and an identical traditional Table of Contents that gets put on the last page. On the Kindle, you can click for the "NCX View" to bring up the meta Table of Contents, and you can also click on "Table of Contents" to pull up the traditional Table of Contents on the last page. This issue is discussed in the Calibre user manual, and adjustment of the XHTML may be necessary during the Calibre conversion process to avoid having two traditional Tables of Contents.
Adding <div> Anchors for NCX and Traditional Tables of Contents
You used the <a id="anchorname"> to establish anchors in your eBook for hyperlink destinations. You can also use the <div id="anchorname"> to establish anchors. The <a href="#anchorname"> will establish functional hyperlinks that direct to anchors established by either <a id=> or <div id=>. The only important distinction is that <div id=> tags go outside <p> tags, which is proper XHTML coding.The purpose of using <div id="anchorname"> is to establish anchors in the XHTML code to help create an NCX Table of Contents.You will use Calibre's options to compile the NCX based on where these <div id=> tags are located in your XHTML. This is much preferable than using Calibre's algorithms to try and determine where the Table of Contents should link. This is also a more preferred method than actually altering the code of the NCX file that is part of the eBook, which is for advanced eBook formatters only and is a time-consuming process.
You can label the id="anchorname" whatever you like, just make sure that they are not duplicated. An example of XHTML code that uses <div id=> to establish anchors is as follows. :
<div id="t1"><p class="title">America Goes On</p></div>Later on during the conversion process of XHTML to an eBook format, Calibre will compile an NCX Table of Contents that is listed as:
<p class="front">By Paul Salvette<br />Copyright 2011 Paul Salvette</p>
<div id="c1"><p class="chapter">Chapter 1 - Joshua Tree</p></div>
<div id="c2"><p class="chapter">Chapter 2 - Reflections</p></div>
America Goes On (will go to Title Page when clicked)You will notice that the actual text for each link on the NCX is whatever is wrapped within the <div id=> and </div> tags.
Chapter 1 - Joshua Tree (will go to Chapter 1 when clicked)
Chapter 2 - Reflections (will go to Chapter 2 when clicked)
Perform the following steps to add anchors for the NCX Table of Contents:
- Go to the start of each chapter or section of the book
- Wrap <div id="anchorname"><p>heading text</p></div> for each chapter or section that will appear in the NCX
- Ensure that each anchorname is unique
An example of the XHTML code for the traditional Table of Contents is as follows:
<p class="headline">Table Of Contents</p><p><a href="#t1">Title</a></p><p><a href="#c1">Chapter 1</a></p><p><a href="#c2">Chapter 2</a></p>
 |
| Traditional Table of Contents |
- Arrange text of Table of Contents in XHTML document
- Add Hyperlinks to Table of Contents text using <a href="#anchorname">hyperlink text</a> for each link
- Verify all links are properly functioning in a web browser
Establishing Anchors for a more Customized NCX (Optional)
When Calibre generates the NCX Table of Contents based on where the <div=id> anchors were placed, it will use the exact text within the <div> tags. Perhaps the content in your eBook says "Chapter 1", but you want the text on the NCX for the link to this chapter heading to say "First Chapter". Furthermore, if you used an image file for each of your chapter headings, how would the NCX file know what the text should read?There is a simple coding technique around this, and it requires a small adjustment of the XHTML. You can create a <div></div> tag with no text that will appear on the screen, but Calibre will recognize and place into the NCX for the chapter.
Hypothetically, you have the following anchor:
If you want to rename the NCX link to this chapter to "First Chapter", you could insert the following code which includes the title="text for NCX" attribute:<div id="c1"><p class="chapter">Chapter 1 - Joshua Tree</p></div>
Additionally it is necessary to remove the "page-break-before: always;" property from the "chapter" CSS class, because otherwise you would have two page breaks.<div id="c1" title="First Chapter" style="page-break-before: always;"></div><p class="chapter">Chapter 1 - Joshua Tree</p>
Verifying your XHTML
Before converting the XHTML into the desired eBook formats, it is beneficial to look over the code meticulously in a text editor and web browser. You have probably made a mistake or two, and the conversion process in Calibre can be quite unforgiving. It is best to locate any errors at this stage.Additionally, it is wise to have your XHTML validated. This can be done by uploading your XHTML file to the W3C website. It will tell you the errors in your document and provide a line number where the error is located.
Some typical errors include:
- Using uppercase tags (e.g. <P> instead of <p>
- Standalone tags that don't end in a slash (e.g. <br> instead of <br />)
- No alt="descriptive text" on images
 |
| Example of Typical XHTML Errors |
 |
| Winning! |
Video Tutorials
12 comments:
I’d need to look at with you right here. That is not something I normally do! I just take enjoyment in looking at a submit that will make individuals feel. In addition, many thanks for permitting me to comment!
he weblog was how do i say it… relevant, finally something that helped me. Many thanks
Paul,
It blows my mind that you can talk and type--all so fast! Thank you for all your terrific work!!!
Does it boil down to these two choices? (1) Submit clean Word file to Amazon and Smashwords, even though both have a fomatting bug when you link to a chapter from TOC, or (2) Decide to do the full SHTML approach that you describe and use Calibre. Even the latter doesn't fix the problem for using Smashwords as a distributor since they require Word format. Do I understand the big picture of this?
Thanks again for your terrific tutorials!!! -Rick
One other thing I discovered is how to automate the creation of the div tags around each chapter for the TOC. With 50-60 chapters in my books, it takes some time to do manually, and inevitably I make a mistake, which I find on xhtml validation. I found a find and replace that works, but unfortunately blogger comments does not allow me to post it :(
I agree, and it's really helpful to learn regular expressions to automate repetitive tasks. I use Notepad++ and I have did a short tutorial here if you're interested.
Dear Paul,
Have you published anything on formatting Word files for print publication on CreateSpace? I'm having problems with the Word 2010 (PC) file for my book. Whenever I Save as Pdf I get a load of 'Error! Bookmark not defined' messages, which, apparently, are the result of deleting entries from the Concordance which I set up to index the book.
I remembered your 'nuking the word processor' advice from when I was preparing the same text (successfully) for Kindle.
Hope you can help - or steer me somewhere. I've been searching forums, etc., for two days now.
Thanks,
Brian
Dear Brian,
I've never tried CreateSpace, but I do know that if you "nuke" the formatting, it will strip out all these bookmarks. When you view your bookmarks, check the little "hidden bookmarks" box and sometimes it will show up those pesky ones you didn't mean to add. Try deleting them and reconverting to PDF. If that fails, try saving your Word file as a .doc as opposed to a .docx and converting to PDF that way.
I'll try the 'nuking' path - only worried that it will also strip out all the other formatting.
I tried saving as an Rtf with no luck - I just get a different message: 'Error! Reference source not found'. Also saved as Word 2003 doc. No luck.
Hold the phone!! While trying to get to what I was doing to tell you I opened the Show hidden paragraph marks and other formatting and, in desperation, tried to delete the offending message (I'd previously tried to do this without opening the hidden stuff without success). And THIS WORKS! I am a very happy bunny.
Thank you for listening and for your help and generosity with the e-book methods. I have recommended the book to many others who are struggling with Kindle (not as easy as they say it is...)
I will post what I've found here on some of those forums where people are obviously having the same problem as I was.
Thanks again.
Brian
Cool, glad it worked out for you. I noticed that if you don't click the "Hidden Bookmarks" box, Word takes the liberty of adding them for you for some reason. If you were still having problems, I would have suggested hitting "alt+F9" to reveal the field codes that show where the hyperlinks are going.
So far, so good. Have a clean Pdf file. Now I only have to go through CreatSpace's 'admissions' procedure which can apparently be a bit hairy.
Word is a very strange programme. Great in so many ways, ornery in others. And Microsoft is very little help when you get into trouble.
Dear Paul,
You've probably been told already, but, just in case, someone is using this comment stream to post ads for Viagra and Burberry. It comes from:
from: Anonymous noreply-comment@blogger.com
to: bastbury########
date: 31 May 2012 11:33
subject: [Paul Salvette in Bangkok] New comment on Turning a Manuscript into Clean XHTML Tutorial - e....
mailed-by: blogger.bounces.google.com
Signed by: blogger.com
(Sorry I redacted my email address, which you have, so that I can't be picked up by others...I hope...).
The body of the text:
"Anonymous has left a new comment on the post "Turning a Manuscript into Clean XHTML Tutorial - e...":
The collections [url=http://www.burberrysitoufficialeoutlet.com]burberry outlet[/url] are usually intriguing and full of fascinating proposals, at this time I present a bag that I liked right away, [url=http://www.burberrysitoufficialeoutlet.com]sciarpa burberry[/url] model winter season and fairlyperfect for our lives every single day. The [url=http://www.burberrysitoufficialeoutlet.com]burberry borse[/url] is a component of the autumn winter 2012, is usually a appropriate product cute andfunny, [url=http://www.burberrysitoufficialeoutlet.com]burberry sito ufficiale[/url] which goesperfectly with a coat of black or white ballet shoes.
Post a comment."
I finally got my book up and running with CreateSpace, due in no small way to your help.
My thanks to you,
Brian
This spam is an unfortunate reality of blogs. Not much I can do, sorry. Glad your book worked out.
Post a Comment